In the world of digital photography, every element — from lighting to texture — plays a crucial role in creating compelling visuals. One often-overlooked technique that can add atmosphere and emotional depth to your images is the lens flare. While traditional lens flares require ideal lighting and shooting conditions, digital tools have made it easier than ever to simulate these effects. Among the best tools available is Photeeq Lens Flare — a powerful and user-friendly solution for adding that perfect spark of light to your images.
Whether you’re a novice or a professional, the Photeeq Lens Flare tool can be your creative companion, helping you elevate your photography to a whole new level.
What Is a Lens Flare?
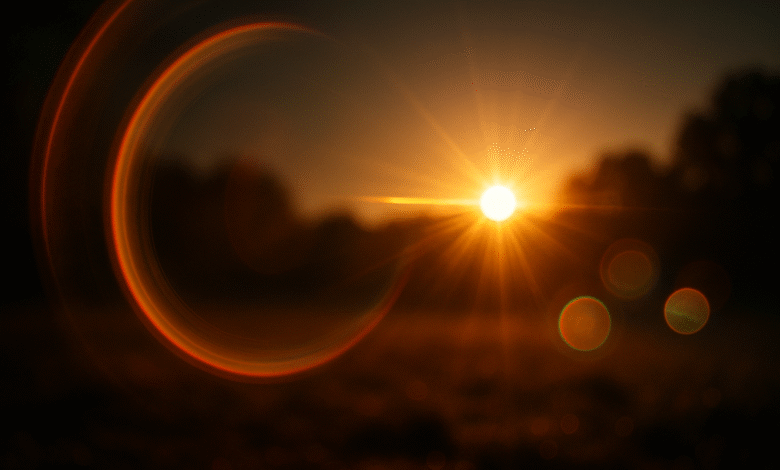
A lens flare occurs when a strong light source, such as the sun or artificial lighting, strikes the camera lens and scatters, creating visible artifacts. These can appear as circles, streaks, or light bursts across the image. While once considered a photographic flaw, lens flares have evolved into a creative element used by many photographers to inject realism, drama, and mood into their work.
Lens flares help:
-
Recreate the natural play of light in a scene.
-
Add cinematic depth to portraits or landscapes.
-
Highlight key aspects of a photo to improve visual storytelling.
But naturally achieving the perfect lens flare is often a technical challenge — requiring the right angle, lighting, and timing. That’s where Photeeq Lens Flare becomes a game-changer.
Why Choose Photeeq Lens Flare?
Unlike traditional methods or even some other editing tools, Photeeq Lens Flare offers photographers total control over their flare effects — without compromising image quality. Here are five standout reasons to choose this innovative tool:
1. Custom Precision and Adjustability
With Photeeq Lens Flare, you’re not at the mercy of natural conditions. You can control every aspect of the flare — from its shape and size to color intensity and position. Whether you’re aiming for a soft, dreamy look or a bold light streak, this tool gives you the flexibility to bring your vision to life.
Example Use Case:
Imagine capturing a wedding during golden hour. By adding a custom warm glow with Photeeq, you enhance the image’s romantic feel while preserving its authenticity.
2. Simple, User-Friendly Interface
This tool is designed with all users in mind — from seasoned professionals to those just starting their photography journey. Its intuitive layout and drag-and-drop functionality make editing stress-free. Even if you’ve never worked with lens effects before, Photeeq Lens Flare makes the learning curve easy.
Quick Tip:
Use Photeeq’s non-destructive editing mode. This lets you experiment freely while preserving the original image quality.
3. High-Quality, Realistic Results
Creating a believable lens flare with generic software is difficult — often ending in results that feel fake or over-processed. Photeeq’s built-in presets are designed to replicate the way real light interacts with a camera lens, resulting in natural-looking flares that blend seamlessly into your photos.
4. Unlimited Creative Options
Lens flares aren’t just about adding brightness — they can enhance mood, create depth, or add a dramatic touch to a simple shot. With Photeeq Lens Flare, you can use subtle enhancements or dramatic flares to match your desired emotional tone, whether you’re shooting a product, a person, or a panoramic landscape.
5. Boost Productivity with Fast Results
Photographers working under deadlines know that speed matters. With its array of presets and simplified controls, Photeeq Lens Flare allows for quick, professional edits. You can achieve studio-quality visuals without spending hours in post-production.
How to Use Photeeq Lens Flare Like a Professional
Using Photeeq Lens Flare is a straightforward process that allows room for creativity and fine-tuning. Follow these steps to create compelling visuals:
Step 1: Upload Your Image
Open the Photeeq application and import the photo you want to enhance. Images with a strong light source work best for realistic flares.
Step 2: Choose a Flare Preset
Browse the available presets to find one that complements your image. From cinematic sunbursts to subtle lighting effects, you’ll find a range of styles to fit your vision.
Step 3: Customize the Flare
Tweak the flare’s properties by adjusting:
-
Angle: Rotate the flare to align with your light source.
-
Size & Intensity: Modify how dramatic or subtle the flare appears.
-
Color: Match the flare’s hue with the overall tone of the photo.
Step 4: Blend It In
Use blending tools to ensure the flare integrates smoothly. Adjust feathering, opacity, and brightness to make the effect feel natural.
Step 5: Final Adjustments
Before exporting, fine-tune contrast, saturation, and clarity to make sure the final image feels cohesive and polished.
Pro Tip:
Use flares sparingly. Overuse can distract from the subject and lessen impact.
Who Should Use Photeeq Lens Flare?
Photeeq Lens Flare is perfect for:
-
Portrait Photographers: Enhance emotional tone or soft lighting around your subject.
-
Landscape Photographers: Add magical sunrise or sunset flares for dramatic impact.
-
Event Photographers: Highlight moments like first dances or grand entrances with cinematic lighting.
-
Content Creators & Influencers: Make social media visuals stand out with striking lens flare effects.
Whether you’re assembling a professional portfolio or simply trying to elevate your personal photography, Photeeq offers the tools to succeed.
Testimonials from the Photography Community
Sarah J., Travel Photographer
“Photeeq Lens Flare transformed my editing process. It retains the essence of the moment while adding cinematic beauty.”
Ben K., Freelance Photographer
“Creating realistic lens flares used to be a nightmare in Photoshop. Now with Photeeq, it’s simple and the results are stunning.”
Linda R., Social Media Content Creator
“My posts get so much more engagement now. Photeeq Lens Flare makes every image pop.”
Frequently Asked Questions (FAQs)
Q1: Can I use Photeeq Lens Flare on mobile devices?
Yes, Photeeq offers compatibility with both desktop and mobile platforms for editing on the go.
Q2: Are there any free presets available?
Yes, Photeeq includes a variety of free presets, with additional premium ones available for purchase.
Q3: Will using lens flares degrade my image quality?
Not at all. The software uses high-resolution editing techniques and non-destructive layers to preserve your original image.
Q4: Can beginners use this tool effectively?
Absolutely. Photeeq is designed with all user levels in mind, offering simple tools that deliver professional results.
Q5: Is there a free trial available?
Yes, Photeeq offers a free trial so you can explore the features before committing.
Final Thoughts
Photeeq Lens Flare is more than just a flare generator — it’s a creative enhancer that empowers photographers to bring their ideas to life. Whether you’re capturing a fleeting moment or staging a conceptual photoshoot, this tool helps you tell a more vivid, emotional story.
Ready to give your images a spark of brilliance? Try Photeeq Lens Flare and unlock a new level of creativity in your photography.
Read also:Innovation News DualMedia: A New Chapter in Digital Journalism